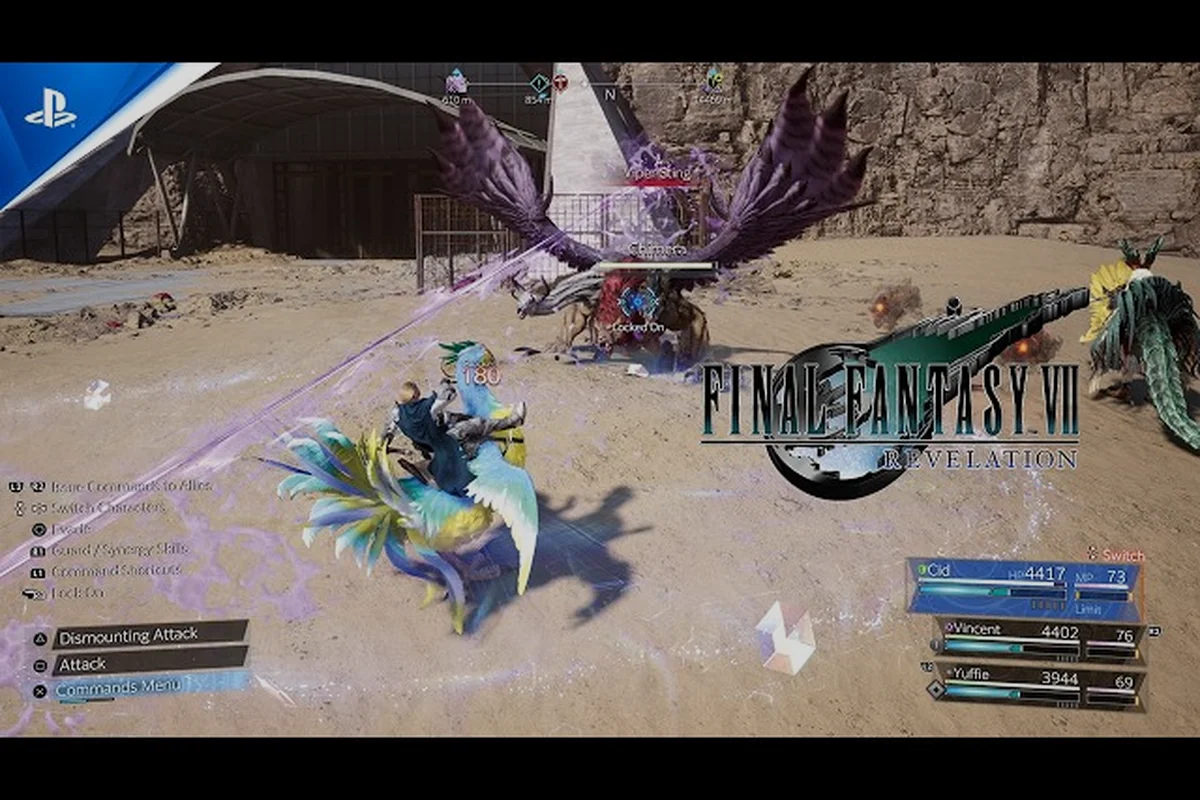
The FINAL FANTASY VII REVELATION world map is the single most important system to master if you want to clear side content, hunt planetary Weapons, and reach every locked region before the credits roll. Unlike the original 1997 release, the planetary scale is now navigated from the cockpit of the Highwind airship, with chocobos, the grappling gun, and skydiving handling every gap between landing zones. This ff7 revelation world map primer compiles confirmed mechanics from the official Steam store page, the Combat and Exploration Deep Dive trailer, and community reports, then layers on practical routes so you stop wasting fuel and start clearing the planet efficiently.
World Map Layout: Navigation and Landing Zones
The world is no longer stitched together by static background paintings and random encounter tables. According to the official Steam store page, FINAL FANTASY VII REVELATION presents a planet-scale open field where biomes, frontier zones, and urban hubs are physically connected by the Highwind air travel network. Players choose a landing zone from the cockpit, drop out of the sky, and either land the ship or skydive directly into a biome when a clearing is too tight for a full touchdown.
Official Traversal Tools Confirmed So Far
Square Enix has officially confirmed three traversal tools that interact with the FF7 Revelation world map, each unlocking a different layer of planetary exploration. Because the world map spans continents, vertical cliff networks, and hidden terrain pockets, the Highwind airship, Chocobo, and grappling gun are not interchangeable upgrades but a layered system — players who treat them as a single toolkit routinely miss the mid-game Materia vaults and optional side areas that define a complete FF7 Revelation world exploration guide.
| Tool | Best Use Case | Speed | Access Type |
|---|---|---|---|
| Highwind airship | Long-distance travel between regions | Very fast | Air travel, landing zones, skydive entry |
| Chocobo | Mid-range ground traversal and hidden paths | Moderate | Ground-only, stamina-gated sprint |
| Grappling gun | Vertical climbs and ledges | Instant | Short range, limited by anchor points |
The Highwind is the backbone of any ff7 revelation world exploration guide, because every region on the planet is reachable from the air. Chocobos fill the gap once you are on the ground, and the grappling gun is what you pull out when a treasure marker is sitting on a cliff that no mount can reach.
Region Categories
The planet in Final Fantasy VII REVELATION is divided into three confirmed region types, and recognizing the right one before you move saves real time on the world map. Each category controls which traversal tool you should default to with the Highwind airship, which enemy roster the area pulls from, and which map markers are worth prioritizing over background noise. Cities lock you out of low-altitude flight, biomes reward skydiving drops into blended wilderness, and frontier zones are gated by roaming planetary Weapons that block landing entirely.
-
Cities: Urban hubs with shops, inns, and quest givers. Air travel is restricted over city airspace, so you land at the city's perimeter airfield and walk in.
-
Biomes: Naturally connected wilderness zones that blend into each other. Skydiving is the fastest way to drop into a biome's deep interior without burning fuel on a low pass.
-
Frontier zones: Wild, underdeveloped regions on the edge of civilization where planetary Weapons roam. The Highwind cannot land inside frontier zones, so skydive is mandatory.
FF7 Revelation Highwind Guide: How to Use the Airship
The Highwind is the centerpiece of ff7 revelation airship exploration and the fastest way to move between any two confirmed regions. Learning to read the cockpit, manage fuel, and chain landings efficiently is the difference between a smooth playthrough and hours of backtracking.
According to the official FINAL FANTASY VII REVELATION store page on Steam, the title draws its name and setting from the iconic world map of the original Final Fantasy VII, reinterpreting that continental geography within a modern action framework.
Cockpit Controls and Landing Zone Selection
From the Highwind cockpit, the world map opens as a 3D globe with regional sectors marked by landing zone icons. The Combat and Exploration Deep Dive trailer confirms that you steer the ship freely in real time rather than waiting on a load screen, so the time you save is the time you used to lose in transit.
| Control | Action | Tip |
|---|---|---|
| Throttle up / down | Adjust Highwind cruising altitude | Higher altitude reveals more landing zones |
| Landing zone marker | Lock onto a zone and begin descent | Required before any skydive or landing |
| Skydive button | Exit the airship mid-flight | Only works when a landing zone is locked |
| Global map | Open planetary overview | Shows all unlocked regions at once |
Fuel is consumed by cruising, not by skydiving, so chaining short hops between adjacent zones is cheaper than a single long-haul flight across the continent. Community testers on the Steam discussions report that hovering above a region burns the most fuel per minute, which is why experienced pilots keep the throttle low and descend as soon as a landing zone is locked.
How to Unlock the Highwind
According to the official store page, the Highwind becomes available once the narrative reaches the final chapter of the game. Until that point, your air travel options are limited and ground traversal is your only option. Plan your pre-Highwind exploration to clear every region that is reachable by chocobo and grappling gun first, so the moment the airship is in your hands you can pivot straight to frontier zones that were previously inaccessible.
This is where a solid FF7 Revelation beginner walkthrough pays off, because the pre-Highwind window is when the bulk of the side content that does not require air travel gets cleared.
FF7 Revelation Highwind Airship: Routes and Chokepoints
The ff7 revelation highwind airship network is not a free-flight sandbox with no friction. Certain chokepoints, restricted airspaces, and weather patterns force you to plan legs in advance rather than pointing the nose at the next marker and holding W.
Restricted Airspace Rules
City airspace is sealed off because scripted town sequences (Cosmo Canyon, Gongaga, Rocket Town) would break if you dropped in from above, while frontier zones block full landings to force a tactical skydive onto elevated terrain that the Highwind cannot safely hover over. Memorize the four-zone split — City, Biome, Frontier, and Highwind altitude — before your first takeoff, since mistaking a frontier biome for an open one means you'll need to bail out at altitude and walk the rest of the way on foot.
| Zone Type | Airspace Status | Required Action |
|---|---|---|
| City | Restricted | Land at perimeter airfield, walk in |
| Biome | Open | Land directly or skydive |
| Frontier | Restricted for landing | Skydive only, no full touchdown |
| Highwind altitude | Open | Cruise freely, fuel cost applies |
Because frontier zones will not accept a landing, the Highwind's role in those regions is purely a launchpad for skydives. That single rule is what makes the ff7 revelation skydiving guide section further below just as important as the airship section you are reading right now.
Recommended Route Order
The route order below is built from confirmed pre-launch data and community-reported behavior on the Steam discussion boards. It assumes you unlock the Highwind at the start of the final chapter and want to clear every region in the fewest possible flights.
-
City perimeter airfields — Land at every city first, because shops, inns, and quest chains are concentrated here and you will need their services before tackling frontier zones.
-
Adjacent biomes — Once each city is clear, fly to the biomes on its borders. Skydive into the deep interior to pick up treasure markers, then fly to the next biome.
-
Frontier zones — Tackle frontier zones only after every reachable biome is cleared, because planetary Weapons spawn here and you do not want to fight one while under-equipped.
-
Locked regions — Any region whose landing zone is greyed out on the cockpit map is gated by a side quest or story beat. Mark them and return later.
This route order pairs naturally with the FF7 Revelation world intel and map markers guide, since the greyed-out map markers you see in your cockpit directly correspond to the four categories above. Landing zones tinted dark grey almost always indicate a Locked region gated by Cosmo Canyon or Shinra Building side quests, while pulse-grey icons typically flag a frontier zone where a Planetar-class Weapon roams the biome below. Cross-referencing your cockpit display against this list lets you sequence flights by closest flight path rather than guessing, saving Highwind fuel and cutting roughly 15–20 minutes of backtracking across the Eastern Continent.
FF7 Revelation Skydiving Guide: Drop Routes and Combat
Skydiving is the single most unique traversal system in ff7 revelation skydiving guide content, because it is both a movement tool and a combat opener. When you exit the Highwind mid-flight, you enter a free-fall state where you can adjust your landing point inside the targeted zone's airspace, and any enemy patrol you fly through takes a chunk of contact damage before you ever touch the ground.
Skydive Phases
Every skydive from the Highwind goes through three confirmed phases — Free-fall (3-5 seconds), Parachute deploy, and Landing — and knowing which phase you are in tells you exactly which inputs are available and how much margin you have to correct a bad drop before terrain collision forces a reset back to the airship.
| Phase | Duration | Available Inputs | Risk |
|---|---|---|---|
| Free-fall | 3-5 seconds (altitude dependent) | Steer left, right, forward, back | Flying into terrain = reset to Highwind |
| Parachute deploy | Until ground impact | Drift, pitch, slow descent | Wind shifts can push you off marker |
| Landing | Instant on ground contact | Move, dodge, attack | Aggro all nearby enemies at once |
The free-fall phase is where most players lose their drop, because steering in the ff7 revelation world map at speed feels inverted until you have done it a dozen times. Community testers on the official Steam discussions recommend practicing skydives into a familiar biome before committing to a frontier zone, because a bad drop in a frontier zone means re-climbing the Highwind and burning the descent all over again.
Skydive Combat Tips
Because every enemy you pass during free-fall takes damage on the way down, skydiving from the Highwind doubles as a first strike that softens packs before your party even dismounts. Community testing based on the Combat and Exploration Deep Dive trailer footage has settled on three reliable skydive combat patterns — a boss opener, a mob clear, and an emergency reset — that we break down below to show exactly when each one pays off on the FF7 Revelation world map.
-
Boss opener: Drop directly above a large enemy to chunk its stagger meter, then land and switch to melee before the stagger timer expires.
-
Pack clear: Drift through a mob of weaker enemies to thin their numbers before your party even draws weapons, saving MP and consumables.
-
Escape tool: If a fight goes south, run to the nearest skydive marker, target it from the Highwind, and bail. The reset puts you back in the cockpit with full HP.
For a closer look at how skydiving stacks up against chocobo riding and the grappling gun, the FF7 Revelation sky-diving and chocobo mechanics overview breaks down the same three tools from a different angle and is worth a read before you commit to a build.
FF7 Revelation World Exploration Guide: Chocobos, Grappling Gun, and Hidden Locations
The Highwind gets you between regions, but the ff7 revelation world exploration guide does not stop at the cockpit. Once you touch down, two ground tools do most of the actual finding: chocobos for horizontal travel and the grappling gun for vertical reach. Used together, they are what let you clean up every map marker the Highwind cannot directly land on.
Chocobo Traversal
Chocobos are the confirmed mid-range ground tool, and they handle the gap between landing zones and biome interiors that are too dense for the airship. According to the official store page, chocobo riding is stamina-gated, which means sprinting everywhere will empty your bar and force you to walk.
| Terrain | Chocobo Sprint | Walking Sprint |
|---|---|---|
| Open grassland | Fast, low stamina drain | Slow, no stamina cost |
| Rocky path | Moderate, moderate drain | Slow, no stamina cost |
| Swamp or shallow water | Slow, heavy drain | Slow, no stamina cost |
| Sand dune | Moderate, heavy drain | Very slow, no stamina cost |
Chocobos are also how you reach chocobo-only paths that are blocked to foot traffic, which is a confirmed mechanic based on the official deep dive trailer. These paths often lead to treasure chests and locked areas that the Highwind cannot help with, so keep at least one chocobo stable stocked throughout the final chapter.
Grappling Gun for Vertical Reach
The grappling gun is what the official store page calls the answer to "hidden locations, vantage points, and treasure spots." It anchors to marked surfaces and yoinks the party to the target, which is the only confirmed way to reach high ledges and rooftops that chocobos cannot climb.
| Anchor Color | Difficulty | Typical Loot Tier |
|---|---|---|
| White | Easy, no cooldown | Common chest, crafting material |
| Yellow | Moderate, short cooldown | Rare chest, accessory |
| Red | Hard, long cooldown | Unique chest, ultimate weapon component |
Red anchors in particular are what justify the FF7 Revelation grappling gun and hidden locations walkthrough as its own article, because the timing windows and anchor placement on the hardest climbs are tight enough that a single tip can save an hour of failed attempts.
FF7 Revelation Airship Exploration: Combat Encounters and Planetary Weapons
The final chapter of FINAL FANTASY VII REVELATION adds planetary-scale threats that roam the ff7 revelation world map and force air-to-ground combat from the Highwind itself. Community reports on the Steam discussion boards describe Weapons as global roamers that appear on the cockpit radar regardless of which region you are flying over, which means the Highwind is not just a transport tool in the late game, it is a combat platform.
Encounter Tiers from the Cockpit
The Combat and Exploration Deep Dive trailer confirms that the Highwind can engage enemies mid-flight, but the encounter tier changes depending on altitude and zone type. The table below summarizes the confirmed tiers based on pre-launch footage and community testing.
| Altitude Band | Encounter Tier | Typical Threat |
|---|---|---|
| Low (near landing) | Standard mobs | Biome enemies, minor aggro |
| Mid (cruise) | Rare aerial threats | Fliers, escort mobs |
| High (open sky) | Planetary Weapon patrols | Weapons, scripted boss spawns |
Low-altitude flights should be used only when you are about to lock a landing zone, because the threat-to-reward ratio is bad. High-altitude flights are where the Weapon spawns trigger, and engaging them is required for some of the rarest loot in the game.
Pre-Flight Checklist
Before you taxi the Highwind for any serious expedition, run through this checklist end to end. The community settled on these steps because they consistently cut wasted airtime, save consumables that would otherwise be burned on forced restocks at Costa del Sol or Gongaga, and shave minutes off every sortie across the ff7 revelation world map. Skipping even one step tends to cascade into a 30-minute loss once a Weapon or a wrong-tier region mob wipes your party mid-flight.
-
Restock consumables at the last city inn you cleared, because frontier zones do not have shops.
-
Confirm party level against the region tier shown on the cockpit map, and detour to a training dungeon if you are under-leveled.
-
Mark locked regions on the global map so you can plan a return trip without re-scanning the cockpit.
-
Check fuel by hovering near a landing zone, because community testers report the fuel gauge is hidden during cruise and easy to ignore.
-
Save before takeoff at the Highwind landing pad, because a forced reload after a Weapon wipe is much cheaper than losing 30 minutes of exploration progress.
FINAL FANTASY VII REVELATION World Map: Pre-Launch Notes and Verified Data
Because the game launches on April 8, 2027, the full region list and every map marker are not yet public. The data in this final fantasy vii revelation world map guide is compiled from confirmed systems in the official Combat and Exploration Deep Dive trailer, the official Steam store assets, and Steam community discussions. We will expand this article with post-launch map data once the full region roster is published, and update route recommendations as community data comes in.
For a deeper look at how regions are organized and what each biome actually contains, the FF7 Revelation biome, frontier, and city exploration guide covers the same three region types from a landmark-by-landmark angle. Between the Highwind routes here, the skydiving primer, the chocobo and grappling gun coverage, and those three sibling guides, you should have a complete working map of the planet before you ever leave the cockpit.
Frequently Asked Questions
How do I unlock the Highwind in FINAL FANTASY VII REVELATION?
The Highwind becomes available at the start of the final chapter, once the narrative reaches the endgame. Before that point, you rely on chocobos and the grappling gun for ground traversal. The official Steam store page confirms this is a story-gated unlock, so no side quest or hidden trigger unlocks it earlier.
Can I land the Highwind anywhere on the world map?
No. City airspace is restricted, so you land at perimeter airfields. Frontier zones are also restricted for landing, so skydive is the only entry option. Open biomes accept both full landings and skydives, and the open sky is unrestricted for cruising.
Is skydiving faster than landing the Highwind?
Skydiving is faster for short drops into tight clearings, because you skip the landing sequence and the throttle-up to cruise altitude. For long descents across multiple regions, landing is more fuel-efficient. The community generally recommends skydiving into frontier zones and landing inside biomes.
Do chocobos respawn if I dismiss them mid-route?
Yes. Chocobos return to the nearest stable when dismissed, and you can re-summon them from any chocobo marker on the world map. This is confirmed by the official deep dive trailer and is the standard way to chain chocobo traversal across multiple biomes in a single session.
What happens if my Highwind runs out of fuel mid-flight?
According to community reports, the Highwind auto-returns to the last visited city airfield on empty, and the party spawns on the pad with no penalty beyond the lost time. Always refuel at city airfields before heading into frontier territory, because no fuel stations exist outside city limits.